
Chasing the Perfect Cookies Aesthetic
I been on a cookie quest for far too long. My neighbor might call me obsessed but I just want each cookie to tell a story through its look and feel. I crank up the oven and watch how the dough reacts to heat in real time. Its wild to see how the edges turn just the right shade of brown while the center stays tender and pillowy soft.
Heat shapes more than just taste. Its the artist behind that cookies aesthetic you see all over social feeds. Remember when you tried to bake too hot and your batch burned on the edges before the middle even set Remember how that flat brick yuck moment felt Thats the power of heat at play. So Im here to walk you through my notes and my experiments from one bake to the next so you can get that picture perfect cookie every time you pull the tray from the oven.
As I bake my fifth batch in one evening Im always surprised at how a tiny shift in temperature or minutes changes everything. That is why I share my trials and errors so you wont end up with a mushy or a crunchy cookie when youre chasing that Instagram ready shot of the cookies aesthetic. We are dialing into the sweet spot between chew crisp and color so your hard work really shows up in each crumb.
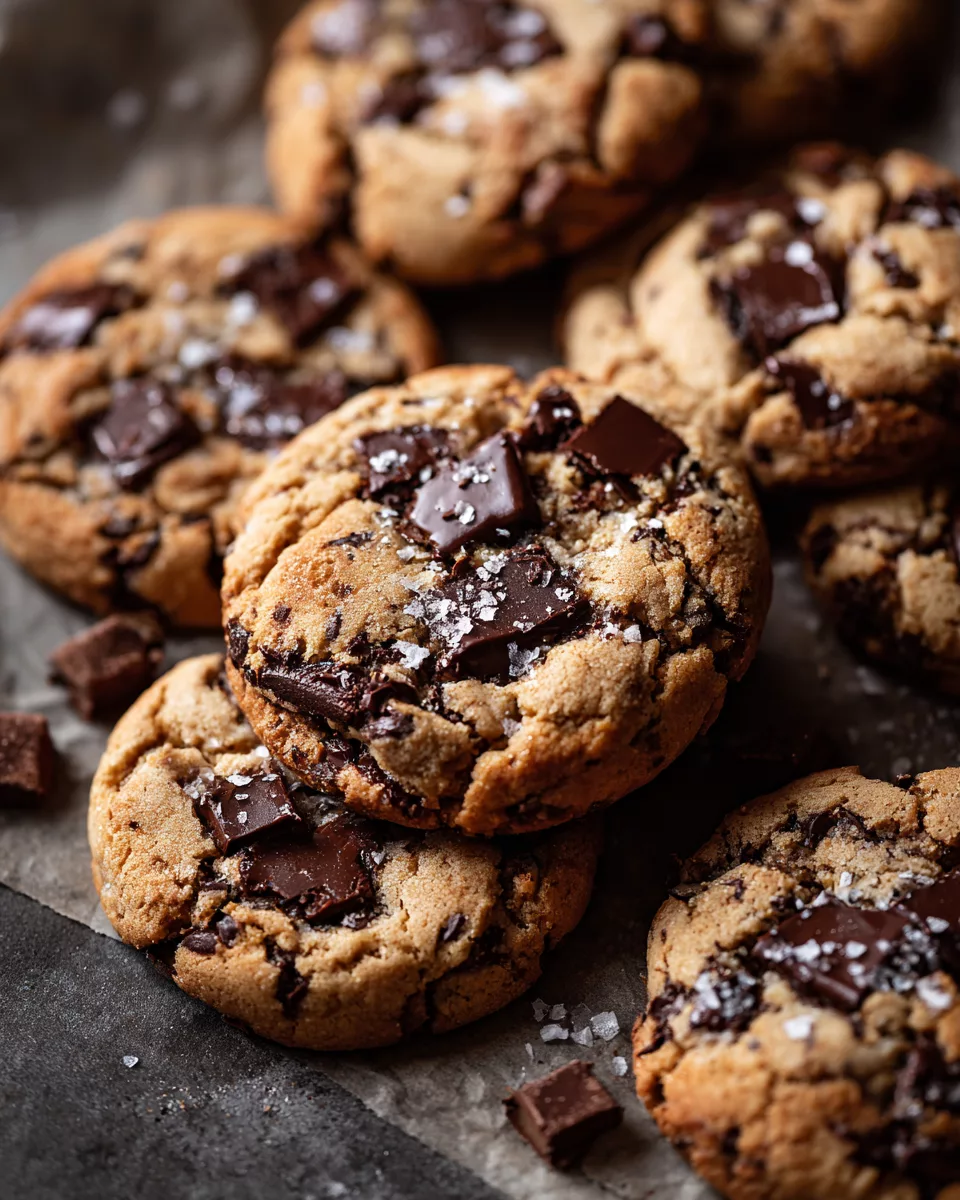
Heat in the Oven and What Happens Inside Your Cookie
When your oven heats up you set off a chain of reactions inside your cookie dough. Sugars start to soften melt and bubble That is where caramelization happens and gives you a nice sweet depth. At the same time proteins from eggs and flour meet those sugars and that is Maillard browning in action. This process adds that toasty aroma and deep shade of brown you want.
If the heat goes too high too fast you risk burning the edges while the middle stays gooey. That is like trusting a fast train to stop exactly on time. But if you bake low and slow you let the dough spread gently Giving it time for protein rest in the oven and for flavors to blend. Its a bit like a slow simmer for a sauce but inside your cookie.
Even the rack position matters. Placing your tray in the center gives you even radiant heat. Top of oven can toast too fast and bottom can burn the base. Thats why I always rotate my sheet halfway through and peek so I know exactly how my batch is doing.
Pantry Stars for the Best Cookies Aesthetic
- All Purpose Flour the backbone of structure in your dough. Picking good fresh flour can help the cookie hold shape while still spreading just enough.
- Unsalted Butter room temp is key so it creams smooth. Butter brings flavor and it helps with that golden edge browning.
- Granulated Sugar for sweetness and light crisp texture. Its small crystals help with that slight crunch on the outside.
- Brown Sugar adds moisture and gives a deeper flavor. It helps create a soft chew that everyone loves.
- Baking Soda for lift and spread. It also helps with Maillard browning so your cookies look golden.
- Salt just a pinch helps balance sweetness and brings out the buttery notes.
- Egg binds the dough together and adds protein that reacts with sugar to brown those edges.
- Vanilla Extract for scent and a gentle flavor boost. You can skip it but its worth adding for that classic cookie taste.
Each one of these pantry stars has a role in your cookies aesthetic. The butter and sugars handle crisp chew and color. The flour and egg give structure and body and allow those flavors to shine. Taking a moment to measure and pick quality ingredients will save you from a flat spread or a dull pale finish. When these items come together they set the scene for that perfect bake.
Getting Ready Before the Oven Hugs Your Dough
First step is to line your baking sheet with parchment paper. That keeps cookies from sticking and it helps them brown more evenly. Next make sure your butter is at room temp but not melty. You should still feel a little firmness when you poke it with your finger.
Grab two mixing bowls. In one whisk together flour salt and baking soda so its evenly mixed. In the other bowl beat the butter with both sugars until its light and fluffy. Dont rush this part you want air whipped into the butter for a lighter cookie.
Then crack in the egg and add vanilla extract. Mix until you see a smooth creamy mess. Now slowly add the flour mix in two stages. Stir until just combined and no streaks of flour remain. This is where that protein rest starts. Cover the bowl with plastic wrap and let it chill in the fridge for at least thirty minutes. This chill helps the cookies hold their shape and improves the flavor before baking.

While dough chills you can tidy up your station and preheat the oven to the right temperature. A well warmed oven ensures a consistent start for all dough balls. Let the rack sit in the middle so you get even heat. Thats the extra step most people skip but it makes your cookies look uniform and bake at just the right rate.
When Your Kitchen Smells Like Cookie Heaven
After ten minutes in the oven your kitchen turns into a sweet wonderland. You catch a whiff of melting butter and sugar dancing together. Thats the start of caramelization building up scent in the air.
A few minutes later the Maillard browning steps in. It adds that warm toasty note making it impossible to resist. At this point it feels like a hug from the oven itself.
At its fullest moment the scent will fill the whole house and might even draw a neighbor to the window. That smell is your sign that sugar caramelization and Maillard browning reached their peak. Its the perfect time to get ready to pull them out for that cookies aesthetic that makes everyone stop and stare.
Midway Peek for Soft Chewy Goodness
Dont be shy about opening the oven door around the six minute mark. This peek is your secret weapon to control your cookies aesthetic. Shaping and density change fast so a quick look helps you decide if you need more time or a faster pull.
At this check in you want to see lightly colored centers and edges just starting to brown. If it looks too pale then close the door and wait a minute more. If the edges already look toasty then pull out the tray and let them rest.
Remember every oven runs its own temperature quirks. That means you might need to jiggle the tray around or rotate it halfway through. Doing this helps with even heat distribution and gives you that consistent color. A little nudge now saves you from burnt edges later.
This midpoint check also helps you spot under or over proofed dough spots. A little pinch at the edge can show if the dough still holds shape or if its too soft and needs more time. It might seem like fussing but it keeps you in control of how chewy or crispy the final cookie ends up.
Testing the Centers for Perfect Texture
When you think they might be done use a toothpick or cake tester. Gently poke the center of a cookie. If it comes out with a few soft crumbs you are in the ideal zone. Thats when you get a soft chewy middle with crisp edges.
If the tester comes out clean that means it set too much and might be a little dry. Next time pull a bit sooner. If its covered in raw dough then pop the tray back in for another minute or two.
After the pull is when protein rest really can shine. Leave those cookies on the hot tray for five minutes. During this time they finish cooking gently and the dough firms up. Thats a crucial step to bring out that great texture without over browning the exterior.
You can also use a metal skewer or thin knife if you dont have a toothpick. That gives more direct heat reading. The goal is not perfection its to see that the center holds together and the edges look set but not dark. Thats where the cookies aesthetic really pops.
Dressing Up Your Cookies for the Gram
To nail that cookies aesthetic you got to plate with some style. Gather a wooden board or a white plate with simple lines. Stack a few warm cookies on top of each other to show off the edges and the soft middles.
Sprinkle a tiny bit of flaky salt or dust a little powdered sugar for a subtle contrast. You can add a mint leaf or a small scoop of ice cream next to them for a pop of color. Light natural light helps bring out the golden tones in the cookie. Snap a few shots before they cool down too much.
Dont forget the background. A neutral linen or a wooden tabletop gives the golden hues room to shine. And if you want to show off the crumb texture break one cookie in half on the plate. The little snap looks so inviting and highlights your perfect bake.
Saving and Reviving Cookie Leftovers
If you end up with extra cookies just store them in an airtight container at room temp. This keeps the edges crisp and the centers chewy. Adding a small piece of bread in the container can help keep things soft and fresh for a couple days.
To revive cookies that got a bit stale heat them for five to ten seconds in the microwave. That brings back some of the chew and warms the flavor. For crisp edge lovers you can pop them in a toaster oven for one to two minutes. That gives the caramelization a little boost so they taste almost fresh.
Leftover dough can even be frozen. Roll the dough into balls and freeze on a tray then transfer to a bag. When you bake the frozen balls just add a minute or two to your bake time. That way you have fresh cookies any time.
If youre short on time you can microwave two cookies stacked with a damp paper towel on top for ten seconds. That trick gives a soft moist feel as if they just came out of the oven. And for a batch that lost some crisp you can air fry them for a minute or so. That revives the edges without drying out the middle.
Key Takeaways and Common Questions Answered
Mastering cookies aesthetic is all about controlling heat and timing. We use slow and low heating to let sugar caramelization and Maillard browning shine. Chilling the dough lets the protein rest and improves taste and texture. A quick oven peek helps nail that soft center and crisp edge balance.
Here are a few common questions I get from friends and neighbors when they try this method.
- Can I skip the chill step If you skip chilling you might get thinner flatter cookies. The dough spreads faster without that protein rest. Chilling gives you more control and lets the flavors meld.
- My cookies burn on the bottom Try moving your rack higher in the oven or lower the temp by ten degrees. You can also use an insulated cookie sheet to slow heat transfer.
- Why are my centers still raw You might need a quick low and slow bake. Lower the temp and bake a little longer to let the middle catch up without over browning.
- How do I get them to look photo ready Use simple plates or wood boards stack them show off the soft insides. Natural lighting works best. Dust a bit of sugar or salt for contrast.
- Can I use brown butter Brown butter brings a nutty aroma but watch your heat. Its hotter so bake a little shorter or lower the temp to prevent over browning.
- What if my dough is dry Add a splash of milk or an extra egg yolk. That adds moisture and helps your dough bind better without changing the sugar balance.
Take these tips and keep experimenting with heat levels bake times and chill durations. Remember how heat shapes every bite and look. Thats the real secret behind that cookies aesthetic. Keep practicing and soon youll have everyone asking for your recipe and how you get that perfect golden texture.

Cookies Aesthetic
Equipment
- 1 mixing bowl
- 1 electric mixer or whisk
- 1 baking sheet
- 1 parchment paper
- 1 rolling pin
- 1 cookie cutters
- 1 cooling rack
- optional decorating tools (piping bags, food coloring, sprinkles)
Ingredients
- 1 cup granulated sugar
- ½ cup unsalted butter Softened.
- 1 large egg
- ½ teaspoon vanilla extract
- 2 cups all-purpose flour
- ½ teaspoon baking powder
- ½ teaspoon salt
- icing for decorating
Instructions
- Preheat your oven to 350°F (175°C). Line a baking sheet with parchment paper and set it aside.
- In a mixing bowl, cream together the granulated sugar and softened butter using an electric mixer or whisk until the mixture is light and fluffy.
- Add the egg and vanilla extract to the mixture and mix until well combined.
- In a separate bowl, whisk together the all-purpose flour, baking powder, and salt.
- Gradually add the dry ingredients to the wet mixture, mixing until just combined to form a dough.
- Lightly flour your work surface and roll out the dough to about ¼-inch thickness.
- Use cookie cutters to cut the dough into your desired shapes, then place them on the prepared baking sheet.
- Bake in the preheated oven for 8-10 minutes, or until the edges are lightly golden.
- Remove from the oven and let the cookies cool on the baking sheet for 5 minutes before transferring them to a cooling rack.
- Once cooled, decorate the cookies with icing, food coloring, and sprinkles as desired.



