I never thought a rainy afternoon would lead me to crunching on Dill Pickle Flavored Saltines with a grin that felt all sorts of right. I was rummaging through my snack drawer looking for something fun to nibble during a quick movie break. Then I spotted a half empty box of plain crackers and a jar of tangy brine at the back of the shelf. I remembered seeing a recipe online that whispered about using pickle juice to transform boring saltines into a vibrant snack. It sounded almost too good to be true but I was game.
Moments later I had lined up a baking sheet and brushed each cracker with that bright green brine. I sprinkled on just enough dried dill while the oven warmed up. The scent that filled my kitchen was sharp and familiar and gave me hope that lunch later that day would be anything but dull.
By the time I slid those crackers out of the oven they were sizzling with flavor the edges curled up in golden crisp perfection. I grabbed one and let the crunch echo through the room. That first bite was everything I had been craving salty tangy herby all at once. From that day on I knew I’d never look at plain saltines the same way again.
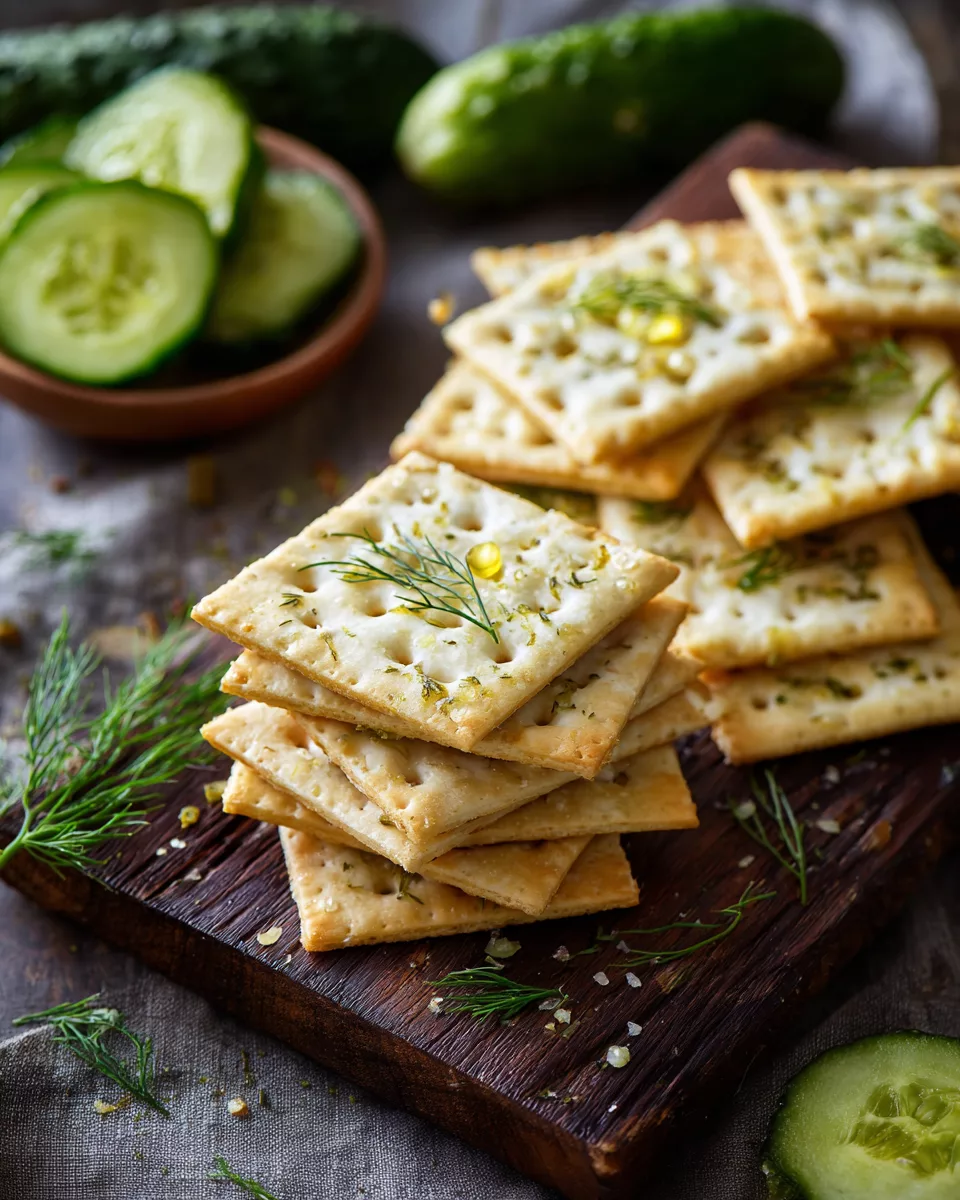
Why folks will dig it
- Bright dill and tart pickle flavor meets classic saltine crunch giving you a snack that pops
- The quick bake method lets you go from pantry to plate in under fifteen minutes
- Main ingredient saltines get a fun twist so you can impress friends with ease
- Versatile appetizer for game day gatherings or a solo treat right after work
Grab bag ingredient rundown
In most cases you only need pantry staples and that jar of brine collecting dust in the fridge. Here are the essentials that make Dill Pickle Flavored Saltines shine.
- Saltine crackers plain varieties work best they crunch evenly in the oven
- Pickle brine leftover dill pickle juice from a jar for that signature tang
- Dried dill weed adds an herby green punch and enhances the pickle vibe
- Olive oil just a drizzle helps the brine stick and crisps the crackers
- Garlic powder optional bump of savory depth you can skip or add more
- Sea salt flakes pinch on top if you like extra crunch and salty kick
That little list covers kitchen staples you probably already have on hand. No trip to specialty stores required.
Quickfire steps with whys
I lay out each step in simple order so you know exactly why we do it this way.
- Preheat oven to 350°F this even heat gives the right crisp without burning
- Line a baking sheet with parchment so cleanup doesnt slow you down
- Place crackers in a single layer this ensures each one toasts evenly
- Combine pickle brine with a little olive oil the oil helps the seasoning stick
- Brush each cracker generously the tangy juice soaks in for bold flavor
- Sprinkle dried dill and garlic powder these herbs create that classic pickle vibe
- Bake on middle rack for eight to ten minutes watch edges for golden signs
- Cool on wire rack a bit so crackers crisp fully before diving in
This method makes sure your Dill Pickle Flavored Saltines are crunchy vibrant and utterly craveable.
Clutch shortcut tips
Over the years I learned hacks to step up this snack without extra fuss. Here are my go to tricks.
- Use leftover brine from any pickles you love mixing sweet or spicy gives fun variations
- Swap olive oil for melted butter it brings a rich toasted flavor your taste buds will love
- Toast small batches at a time this keeps crackers fresh and you can adjust seasoning on the fly
- Store on paper towels before sealing in a container that removes any lingering moisture
These tips will keep your homemade snack bar ready for game nights study breaks or late night cravings.
First bite grin story
One afternoon my son came home early from school stomping with hunger. I had just pulled the tray of Dill Pickle Flavored Saltines from the oven. I offered him one and he took a bite before even sitting down. His eyes went wide his hand shot up for another.

He said this taste are like a chip and a cracker had a baby he couldnt explain but he loved it. He asked could he take a handful to finish during his homework. I watched him crunch through them faster than I expected. It was all little unrehearsed delight and genuine surprise. That grin on his face told me I could never go back to plain old saltines again. It was snack victory in my kitchen that day.
Chill serving ideas
You can dress up these dill pickle treats for any occasion without losing that effortless vibe. Here are a few of my favorite ways to serve them.
- Top with a cream cheese dollop and a sliver of smoked salmon for a classy appetizer
- Pair with a bowl of homemade tomato soup for a fun twist on lunch classics
- Line them on a charcuterie board next to cheeses charcuterie and olives
- Serve alongside buffalo chicken dip for crunch that stands up to bold flavors
Each idea brings out different notes in those crackers so you can mix and match any party spread.
Leftover stash and reheat guide
I get it you wont devour every single bite in one sitting thats why I stash extras right. Let me walk you through how I keep them fresh and bring them back to life.
- Cool completely before storing so steam doesnt soften them
- Use an airtight container lined with a paper towel this wicks away any moisture
- Place a silica packet or a piece of bread on top these tricks help absorb humidity
- Reheat in a toaster oven at 325°F for two to three minutes this revives crisp without burning
- Skip the microwave it makes them gummy and sad
With this method your dill and pickle tang stick around until your next snack attack.
Feel good wrap up and FAQs
With just a handful of pantry staples and less than fifteen minutes you can transform plain crackers into tangy herby nuggets of delight. I still cant believe how simple it are to make Dill Pickle Flavored Saltines that taste so much better than any store bought snack. You gets the best of savory dill, crisp baking method and bold pickle notes all in one crunchy bite. Whether it becomes your go to party appetizer or that after school treat I hope you feel that same first bite grin I do every time.
Here are answers to questions you might have as you dive in.
- Can I use another type of pickle juice yes you can swap in sweet bread and butter brine or spicy jalapeno juice for a new spin
- Will the crackers get soggy in storage if you cool fully and store with paper towels they stay crisp for days
- Can I skip the garlic powder absolutely it keeps the focus on dill and pickle tang
- Is there a stovetop version of this snack you could brush and crisp in a skillet over medium heat but watch closely for burning
- How do I scale up for a crowd just line multiple sheets in your oven rotate halfway through bake so each one gets perfect heat
Now you are ready to snack happy and show off your new favorite homemade treat.

Dill Pickle Flavored Saltines
Equipment
- 1 medium mixing bowl
- 1 whisk
- 1 baking sheet
- 1 parchment paper optional
- 1 airtight storage container
Ingredients
- 1 sleeve Saltine crackers About 40 crackers.
- ¼ cup dill pickle juice Adjust according to taste preference.
- ¼ cup vegetable oil
- 2 teaspoons dill weed
- ½ teaspoon garlic powder
- ½ teaspoon onion powder
- ½ teaspoon black pepper
- 1 teaspoon kosher salt
Instructions
- Preheat your oven to 350°F (175°C) if you choose to make them crispy; otherwise, you can skip this step for a no-bake version.
- In a medium mixing bowl, whisk together the dill pickle juice, vegetable oil, dill weed, garlic powder, onion powder, black pepper, and kosher salt until well combined.
- Carefully arrange the Saltine crackers in a single layer on a baking sheet lined with parchment paper, if desired.
- Brush or drizzle the dill pickle mixture over the crackers, ensuring they are evenly coated.
- For a crispy version, bake the crackers in the preheated oven for 5-7 minutes until they are warm and fragrant, but watch carefully to prevent burning. For a no-bake version, simply let the coated crackers sit for about 10 minutes to absorb the flavors.
- Once done, let the crackers cool completely before transferring them to an airtight storage container to maintain freshness.