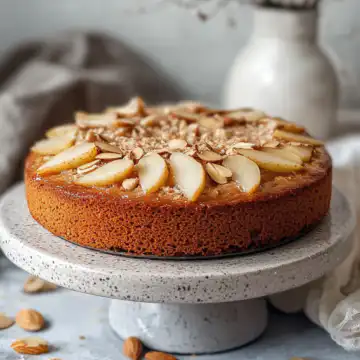
Spiced Vegan Pear Cake in Your Pressure Cooker
This spiced vegan pear cake is moist, tender, and perfectly aromatic, thanks to the pressure cooker that locks in all the juicy fruit flavors and spices. A quick and easy recipe that delivers a delicious, cozy treat in less time than traditional baking.
Ingredients
Main ingredients
- 1 ¾ cups all-purpose flour to give your cake a nice tender crumb
- 2 teaspoons baking powder for that perfect rise
- ½ teaspoon baking soda
- 2 teaspoons ground cinnamon to warm up all the flavors
- 1 teaspoon ground ginger
- ½ teaspoon ground nutmeg
- ½ teaspoon salt to balance sweetness and boost those spices
- ½ cup dairy-free plain or vanilla yogurt for moisture and soft crumb without any dairy
- ½ cup cane sugar to sweeten gently
- ¾ cup unsweetened non-dairy milk almond milk works real good
- 1 tablespoon lemon juice for extra brightness
- 1 teaspoon pure vanilla extract for aroma
- 1 fresh pear (diced) to fold into the batter
- 1 fresh pear (sliced thin) for a pretty cake top
Instructions
Instructions
- Preheat your oven to 350°F even though you’ll pressure cook later—it helps get everything ready for final cake cooling and crisping.
- In a big bowl, whisk all your dry stuff: flour, baking powder, soda, cinnamon, ginger, nutmeg, and salt. This mix smells amazing even before wet gets added.
- In another bowl, stir together the dairy-free yogurt, cane sugar, and non-dairy milk. You want it smooth and blended real good.
- Mix the wet into dry but just gently—don’t overwork that batter or it’ll get tough.
- Fold in the diced pear chunks carefully so they don’t get mushed but’re nice and spread out.
- Pour batter in greased pan, layer the sliced pear on top with a sprinkle of sugar and cinnamon mix. Now you pop it into the pressure cooker set with trivet and about a cup of water for broth depth.
- Lock the lid, wait for the float valve to rise then cook on high pressure 40 minutes. Do a quick release when timer’s up and open lid once float valve drops back down.
- Slice and serve warm with your favorite beverage or enjoy as is.
Notes
Store leftover slices in an airtight container in the fridge for up to 4 days. Freeze individual slices wrapped in plastic for up to 2 months. Reheat briefly before serving for the best taste and texture.